|
 Installing an Electronic Brake Controller In the 2500HD/3500 Trucks Reprint from 2001 By Jim Bigley
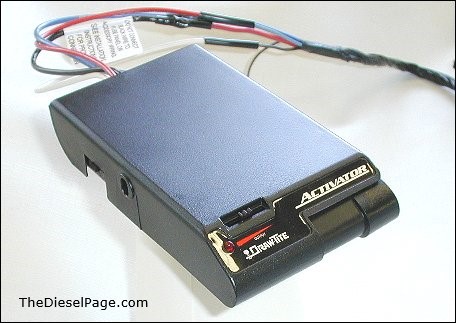
We all spend a lot of time making our trucks run faster and pull stronger. While that aspect of towing is very important, being able to safely bring your truck and trailer to a stop is perhaps even more important. This month, we'll discuss the installation of an electronic brake controller. The Draw-Tite Activator® #5100 electronic brake controller shown on the left is typical of those available on the market today, and is available for $60-70 at nearly any auto parts store. This particular controller was chosen because of past experience with Draw-Tite controllers on two previous trucks. Simple to install, simple to use, and works very well. Activator® Features:

Making the connections from the controller to the truck wiring is the trickiest part of the installation. This is complicated by the fact that the manufacturers of brake controllers decided on an odd color code combination, that eventually became standardized by the industry. Color Code:
The new GM trucks (those equipped with a towing package) come with a wiring pigtail that can be used to make the connection between an electronic brake controller and the truck wiring. As shown in this photo, the blue wire on the controller connects to the large dark blue wire on the GM pigtail. The controller black wire connects to the large red wire on the GM pigtail. The red controller wire connects to the small light-blue pigtail wire. And finally, the controller white wire connects to the small black wire on the GM pigtail. The GM pigtail also includes a brown wire, which can be used to power a night-time illumination lamp, if your controller is equipped with a lamp. In my case, I'll use that brown wire to power the accessory lamps in my next project - an EGT and boost gauge. 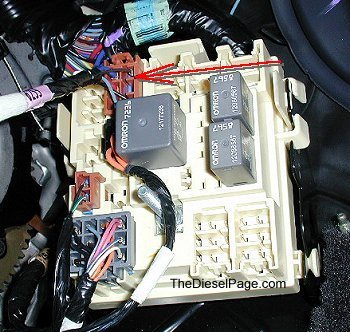
The connector end of the new GM pigtail plugs into an electrical panel behind the emergency brake pedal, on the firewall. The arrow in this photo points to the jack used for the controller pigtail. Once all of the connections have been made, route the length of the pigtail up and over the brake pedal assembly, and away from any sharp edges or obstacles that might affect the wiring over time.
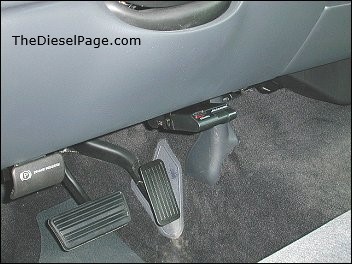 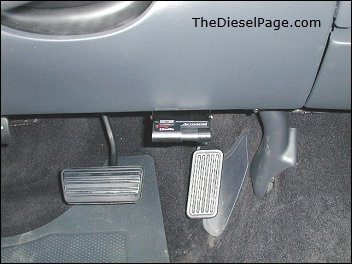 Mounting the new controller to the dash is the next step. The bottom edge of the dash in the new GM trucks ends with a metal lip that I used to drill and mount the controller. This mounting location keeps the controller out of the way when getting into and out of the truck, and there is not much chance of bumping your leg on the controller. If need be, I can still reach the controller, either to make sensitivity adjustments or to operate the manual brake control button if necessary. 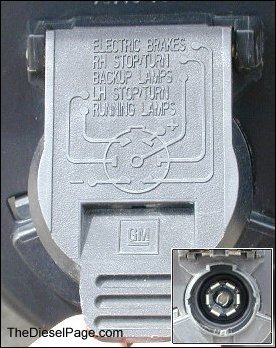
This photo shows the "pinouts" for the trailer wiring. The pin for the trailer brakes is located on the lower right quadrant of the plug. Check for a varying 12 volts on this pin when checking the operation of your controller. In addition, the red indicator light on the controller should illuminate whenever the brake pedal is pressed. This will indicate that the basic electrical hook-up of the controller is correct.
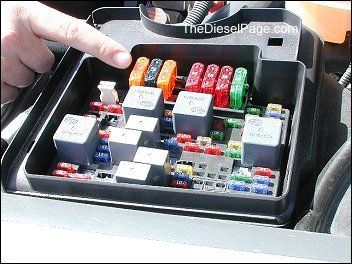
There is a 40 amp B+ Trailering Maxi-fuse taped to the GM brake controller pigtail. The electrical panel under the hood, over the driver's side fender is where this fuse will be inserted, as pointed to in this photo. This fuse protects the trailer battery charging circuit in the truck's wiring. If your trailer doesn't have an on-board battery, you can leave this fuse out. It is only necessary to charge your travel-trailer's onboard batteries. Power running through this fuse is not switched. This means any electrical load required by your trailer (interior trailer lights, etc.) will suck your truck's batteries flatter than a pancake if you leave the trailer plug connected to the truck with the engine off. How long that might take depends on the electrical load. Most RV service departments install an ignition switch activated relay in the charging circuit. This will cut power supplied to the trailer when the truck's ignition key is off. My last truck had a relay, but there were times I wished it didn't. So, I'll not install one in this truck. 
Once you've checked the correct operation of the controller by verifying that the red light on the controller illuminates whenever the brake pedal is pressed, and measuring a variable 12 volts on the brake pin of the trailer plug, you can fine tune your controller using both the "Output" control and the "Sync" control. The "Output" control, located on the top-left of the controller, is used to set the degree of brake application. Use more control for heavier trailers, or less for lighter trailers. This can be useful to achieve a balance between vehicle and trailer brakes, to maximize stopping power, or adjust trailer brake application while driving on slippery roads. The "Sync" control slide is located on the left side of the controller, and is used to adjust the trailer brake application "aggressiveness". In other words, this varies the time the controller takes to reach full output once the brake pedal is pressed. The trailer brakes become more aggressive (quicker acting) when sliding the sync control away from you, toward the front of the vehicle. This control is useful when switching trailers (lighter or heavier), or for general driver preference. 
Properly equipping your truck with a brake controller is a pretty simple task, and one that will help you enjoy your time on the road.
Draw-Tite, Inc.
What's New: | Feature Articles: | Product Reviews: | Member's Duramax Page: Join Us: | Advertisers: | Classified Ads: | TheDieselPage.com BB Forum:
E-Mail: turbo@TheDieselPage.com |