|
 NVG-261/263 Transfer Case Leak Prevention By Jim Bigley
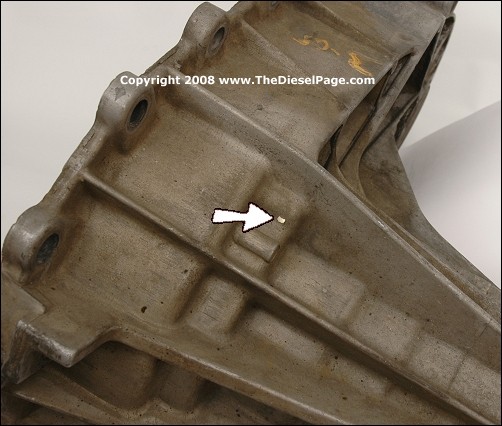
For several years now, we've been hearing reports of transfer case fluid leaks due to a wear-through on the rear case half (see photo on the left). Some New Venture Gear 261 (manual shift) and the NVG-263 (electric servo shift) transfer cases have developed leaks due to the internal fluid pump flange wearing a hole through the rear case half. If not caught before a leak develops, the transfer case could suffer complete failure due to a lack of lubrication. GM's band-aid fix up to this point in time has been to apply an epoxy patch over the hole. The most reliable solution involves either a new rear case half or welding the hole(s) closed (magnesium case), and then installing an aftermarket part that permanently solves the problem. Follow along as we show you the problem and describe what it takes to produce a permanent solution. 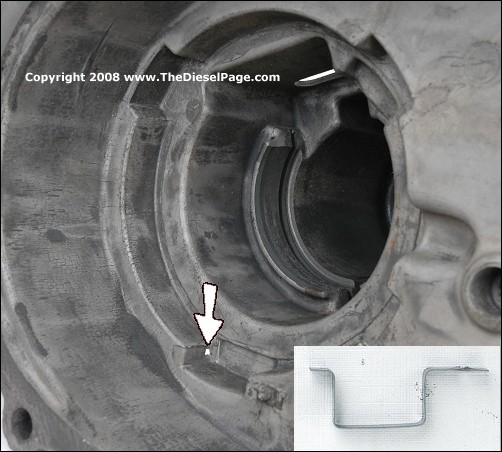 > >
Tabs on the transfer case fluid pump flange are keyed in matching notches located in the rear case half. The tabs of the pump flange normally rub against the edge of each pocket shown in this photo. To prevent a wear-through, New Venture (the manufacturer of the transfer case) installed a single stamped-steel wear clip into just one of the pockets (see inset photo). This wear clip can break or slip out of position over time. This allows the pump flange tabs to wear directly against the magnesium case, eventually wearing through and causing a fluid leak. 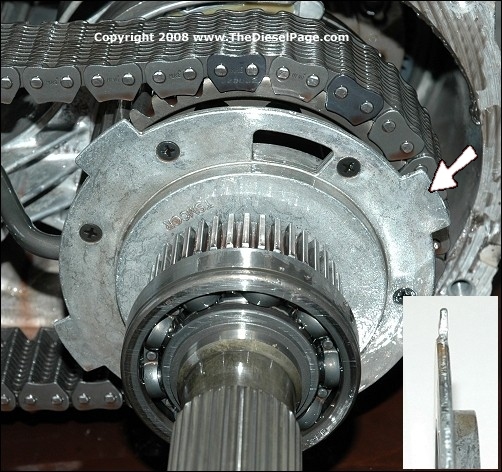
The cast aluminum pump flange is held onto the pump using a series of #2 Phillips head screws. When we first learned about this problem, I wondered whether a case wear-through was more likely to happen to trucks that were more often driven in 4WD. As it turns out, running in 4WD has no effect because the fluid pump turns whenever the rear output shaft turns - in both 2WD and 4WD. The inset photo shows how thin the leading edge of each pump flange tab is. Without the steel wear clip in place, each flange tab quickly wears through the corresponding pocket in the magnesium case. 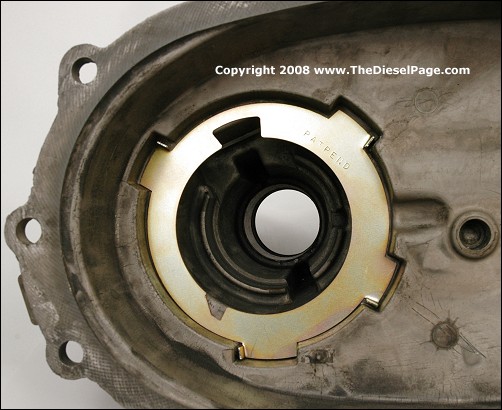 Kennedydiesel.com sent us an Adapt-a-Case transfer case repair part that could be the simplest and most cost effective solution yet. Instead of using a single stamped-steel wear clip, the laser-cut steel Adapt-a-Case wear plate allows all four tabs of the pump flange to share the load equally, and is kept in place by the pump flange itself. It cannot become dislodged or fall out of position. 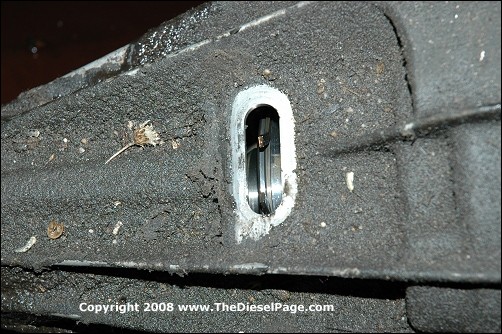
Once the transfer case has been removed from the truck, you'll need to remove the rubber plug on the upper portion of the tailshaft housing, then spread the snap-ring using snap-ring pliers and move it to the rear, off the bearing race. Once that's been completed, you can remove the vehicle speed sensor, located farther up the tailshaft. Our transfer case had a small leak that originated at the mating flange for the front & rear case halves, which allowed a lot of grime to accumulate over 60,000 miles. Our truck's transfer case didn't exhibit the wear-through problem shown in the above photos, but a pump flange wear prevention upgrade was installed as a preventive measure. And, we pressure washed the case before re-assembly. 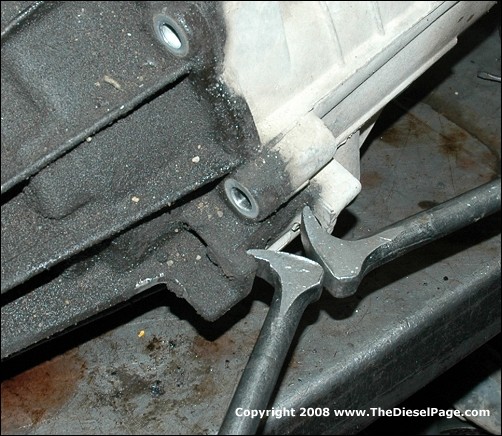
The case halves are separated using two prybars. The case design conveniently includes a set of pry blocks on each end of the chain case. 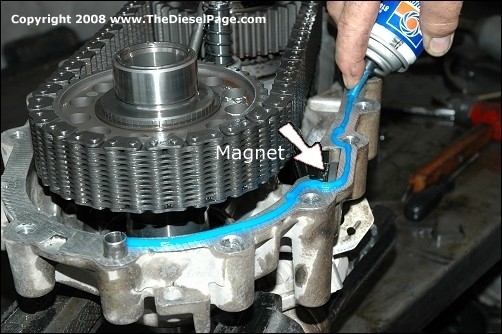
After checking the case pump pockets for wear, remove the original wear clip, and install the Adapta-a-Case wear plate in its place as shown in an earlier photo. Clean the pump pickup magnet (pointed to in photo). It'll likely have some accumulated grunge. Clean the case mating surfaces using brake cleaner, then apply a 5mm bead of RTV gasket compound to the flange on the inboard side of the bolt holes. Having the forward half of the transfer case mounted vertically on the bench helps the rear half slide over the various shafts and fittings during reassembly.
After studying the new Adapta-a-Case wear plate, I couldn't help but wonder why this wasn't a part of the original design of the transfer case. I like the cheap, easy and permanent solutions. TDP 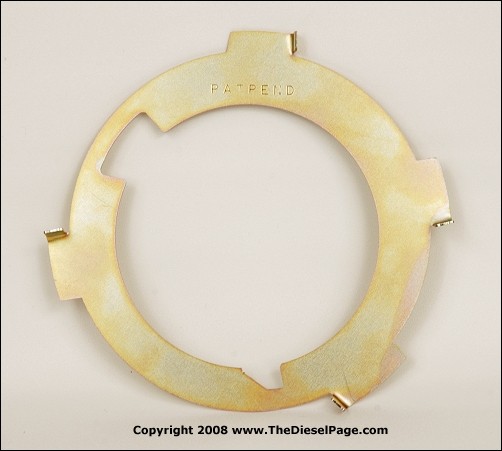
Following this service procedure, the transfer case will require 1.9 qts of Dextron III or IV Automatic Transmission Fluid. More discussion about this transfer case leak problem can be found in The Diesel Page Forums. Adapta-a-Case Source:
Kennedy Diesel
What's New: | Feature Articles: | Product Reviews: | Member's Area: Join Us: | Duramax Diesel Page: | Advertisers: | Classified Ads: | Books: Search The Diesel Page: Send e-mail to: turbo@TheDieselPage.com Copyright © 2008-2018 by The Diesel Page www.TheDieselPage.com |

